• Facebook
  • Instagram
  • Pinterest
  • Snapchat
  • Twitter
  • YouTube
  • Skip to primary navigation
  • Skip to main content
  • Skip to primary sidebar

MsMarmiteLover

  • Food
    • Recipes
    • Vegetarian
    • Vegan
  • Travel
    • France
    • Italy
    • Spain
    • UK
  • Wine
  • Gardens
  • Supperclubs/Events
  • About
    • Published Articles
    • Books
  • Shop
    • Cart

How to make a sourdough loaf in 15 easy steps

September 25, 2013 31 Comments Filed Under: Food, Recipes, Uncategorized

Gluten! We loves it. Emmanuel Hadjiandreou.

This is following Emmanuel Hadjiandreou’s technique. Which has worked like a dream for me. The great thing about his method is there is none of this throwing half the starter away rubbish. You don’t have to waste flour. I always hated having to throw away starter.
Why is this? Effectively, once you have your live mother, you keep it in the fridge and just use a tiny bit every day to make a poolish or pre-ferment. (Yes poolish is connected to Poland. The person that invented this technique was a Polish baker living in France. Actually the French invented sourdough, someone took that to San Francisco, where they perfected their own sourdough). 

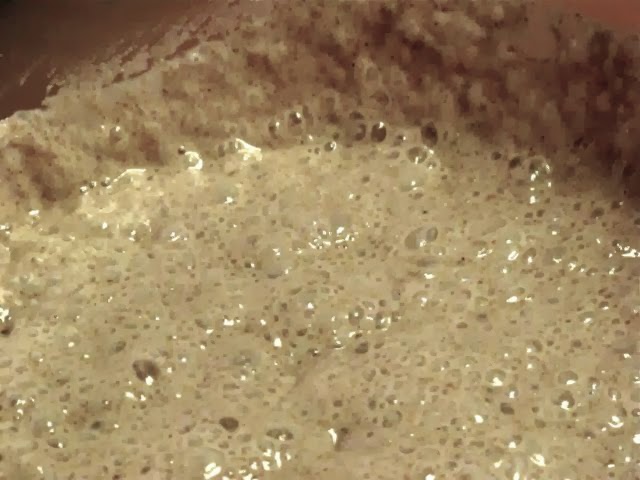
As stated in the last post How to cure a sick mother, you have taken 5g of your starter, and added 50g of flour (rye is best to get it going again, white is fine too) and 50g of luke warm water. You’ve covered it and left it over night.
You now have 105g of sourdough starter. But overnight your starter will have lost 10g so call it 95g.

What to do now?
1) Now take 75g of it. Put the rest back in the fridge. If you are not baking again for a while, you can add it back to your original revived mother. (If you are going to bake again very soon, you can keep the 20g and feed it with 50g of flour, 50g of water, leave overnight, do the whole cycle again.)

Get out your digital scales. Because you have some don’t you? Seriously you need to buy these for any attempt at efficient baking. They don’t cost much. I know my American readers are resistant to scales but look! You can buy them in America too! Only 25 bucks! You can change them from ounces to grams just for this recipe.
Babes, I want you all to be gram perfect. I want you to become anal about weighing. 
2) In a large bowl, add 150g of warm water to the 75g of sourdough starter.
Mix well. 
3) In a separate bowl add 250g strong white flour
4 g salt.
Mix well.
4) Add the flour/salt mix to the sourdough/water mix.
Mix well.
Leave for 10 minutes, covering with the other bowl. 
5) Then, ideally using a scraper, or your hands, start to shape the loaf.
(This is what baker Emmanuel Hadjiandreou does instead of kneading. But it works.)
Pull the side of your ball of dough outwards then tuck it into the centre. Moving the bowl around as you go, you do this 10 times going around the ball of dough.
If it starts to become stiff and the dough tears, then stop. 

6) Wait for the dough to relax for ten minutes, then do the pulling into the centre kneading technique again. Do this four times in total with a ten minute interval in between. 
At the end of this you should have a nicely smooth ball which is strong in structure and will rise.
Make sure you have scraped all the dough from the sides of the bowl into your round ball of dough.

7) Rest it for one hour.

8) Prepare your proving basket (I found this type works well, it ain’t pretty like the others but the dough doesn’t stick) or use a colander lined with cheesecloth, or a bread basket lined with a non-fluffy tea towel, by dusting it liberally, up the sides too, with wholemeal or rye flour. If you’ve only white flour, use that. This must be well coated with flour as you don’t want your loaf to stick.

9) Dust the dough ball with wholemeal or rye flour (or white if you have nothing else).
Scoop it into your already prepared proving basket or the cheesecloth lined colander. 
10) Then leave this to proof for 3 to 6 hours or overnight or until doubled in size.

11) Preheat your oven to 250C. Place a shallow tray in the bottom and a flat baking tray in the middle.
12) When hot:
Place the dough ball, flipping it over, onto a pre-heated baking tray, dusted with semolina. 

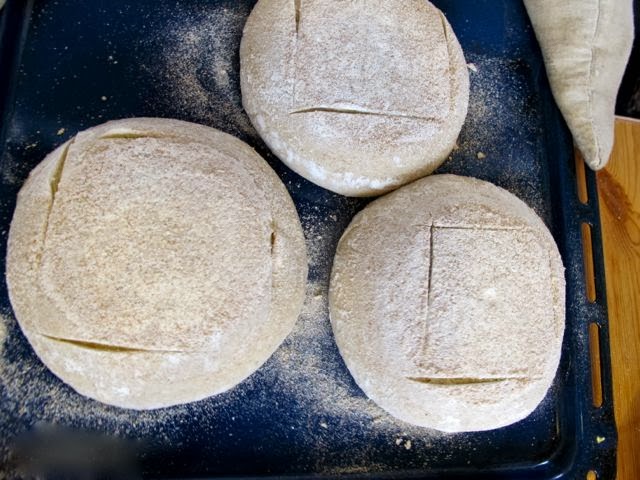
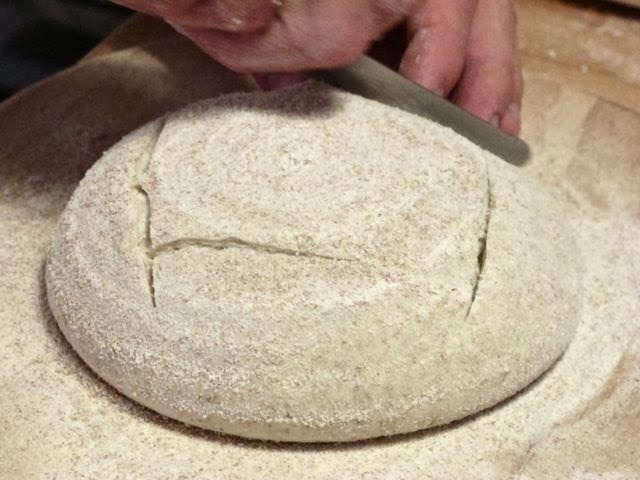
13) Slash the top with a corrugated knife. (I always forget this.)

14) Bake at 250C, adding a cup of tap water into the hot tray placed into the bottom of the oven. This creates steam and gives you a crust.
After 10 minutes lower to 220C. (If you have an Aga, put in the cool shelf.)
Bake for 30 minutes in all.
Knock on bottom, it should sound hollow. You want a deep bassy sound. Emmanuel thinks we underbake loaves in this country. 

15) Place on cooling rack.
When cool, slice and enjoy. If you are impatient and can’t wait till it cools, don’t slice from the middle, slice from the end. While it’s cooling you see, it’s still baking inside, even though it isn’t in the oven. 
Good resources in the UK: 
Equipment: 
Bakery Bits (ships worldwide)
Richard Bertinet
Lessons:
Emmanuel Hadjiandreou and others in:
North West London at The Baking Lab
or Nottinghamshire at the School of Artisan Food 
Bath: Richard Bertinet 
Near Edinburgh: Andrew Whitley’s Bread Matters
London and other places: Jane Mason’s Virtuous Bread
Northhampton: Juniper and Rose cookery school (lessons by Dan Lepard and Vanessa Kimbell)
Flour:
Shipton Mill
Doves Farm.
A note: The teen made her first sourdough loaf last week using this method. I do believe, after learning to read, write, count, use a computer, that teaching your kids to bake bread is one of the most useful things a parent can do for a child. It should be obligatory at school. 
I do recommend getting a hands on lesson if you can afford it. It made all the difference for me. 

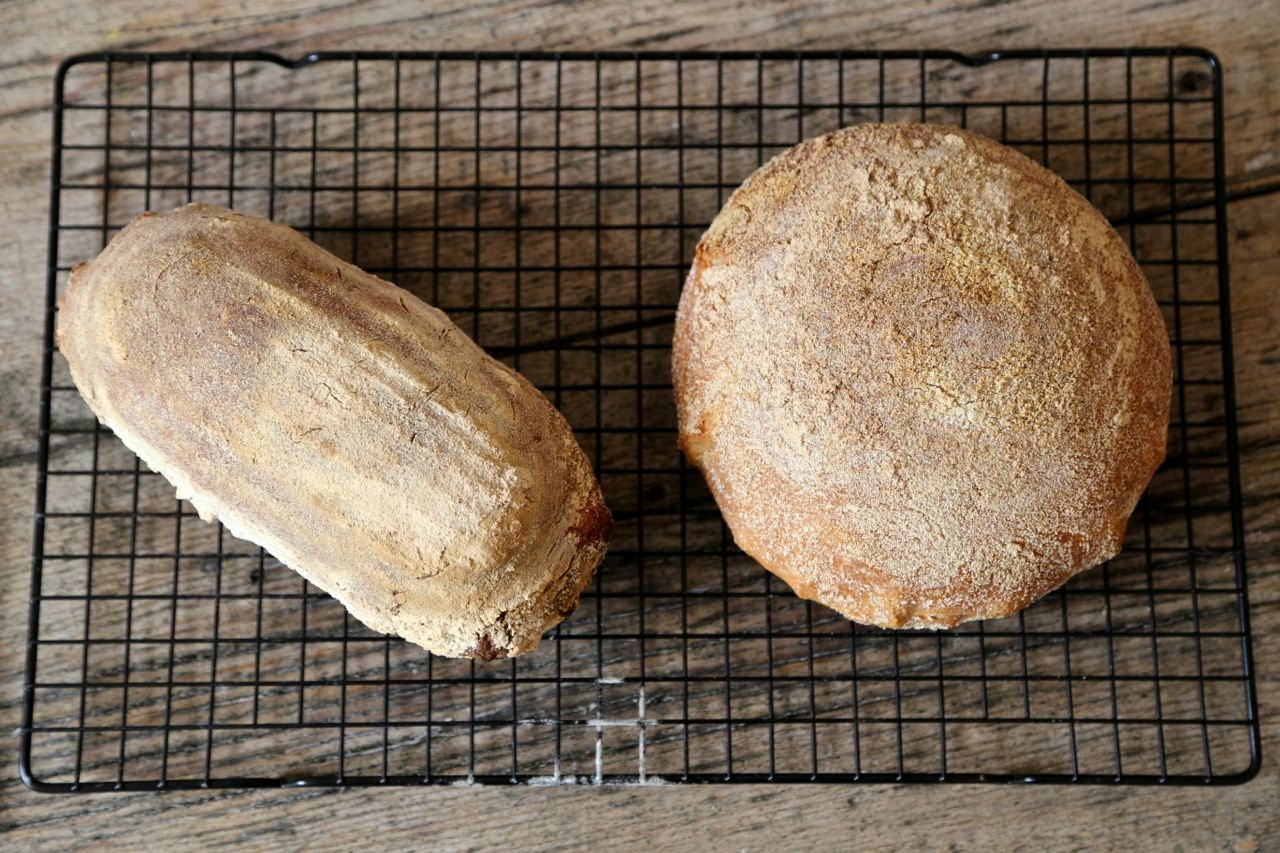
I baked these this morning. Yeah I forgot to slash again.

Recent posts

Smoked haddock chowder recipe in Suffolk

March 17, 2023

Jewish Italian food; artichoke season

March 11, 2023

Tinned fish recipes

February 11, 2023

Previous Post: « How to cure a sick mother
Next Post: Recipe for pickled walnut and blue cheese salad »

Reader Interactions

Comments

  1. Mamacook

    September 25, 2013 at 12:15 pm

    I used to work in a bakery. It's a really good idea to slash them because you get a more even and often better rise in the oven. You do have to use a really sharp serrated knife and be confident with it.

    Reply
    • Kerstin Rodgers

      September 25, 2013 at 4:33 pm

      It's not lack of confidence, I literally forget every time.

      Reply
  2. Debs Dust Bunny

    September 25, 2013 at 12:55 pm

    More timely advice! Thanks.

    Reply
  3. Gloria

    September 25, 2013 at 6:04 pm

    I always had a problem with my dough spreading out and not having much oven spring (the initial burst of rising when the heat hits the dough and it begins to bake). My oven isn't up to scratch basically, so now I always use a cast iron lidded pot (think some people call them Dutch pots), so creating an oven in my oven.

    I put the pot with lid in the oven to heat up. Once oven reaches temperature, I tip the dough into the pot, slash the top if I remember to, replace lid and bake at 250C for 35 mins, then remove the lid, lower oven temp to 220C and bake for further 25 mins.. I make a loaf twice the size of the one in your recipe, so that's why the baking times longer, so adjust to suit a smaller loaf. I get really reliable results this way and great oven spring.

    Reply
    • Kerstin Rodgers

      September 25, 2013 at 9:38 pm

      I did the Dutch oven technique for a while but with Emmanuel's technique I now have well structured loaves that don't spread out into pancakes. I like this size loaf, it's perfect for someone living alone too!

      Reply
    • Gloria

      September 28, 2013 at 8:26 am

      I'm very fond of my retro English Electric 60's oven (with teal coloured splashback) and I've learnt how to get good results from it. No doubt most people are more up to date than I am and have ovens that are more efficient.

      Reply
  4. IzzyB

    October 1, 2013 at 2:39 pm

    Thank you twice over – for the chef-resurrection advice and also for this recipe, both of which worked a treat. So little effort compared with other sticky-sourdough-up-to-the-elbows experiences I've had. Plus a really great crust.

    Reply
    • Kerstin Rodgers

      October 2, 2013 at 4:21 pm

      Yay! I'm so glad it worked for you.

      Reply
  5. toko sepatu grosir

    October 3, 2013 at 4:24 pm

    Great, thats look easy steps. Thanks 😉

    Reply
  6. Abe

    September 4, 2014 at 11:00 am

    Thanks for that. Just want to point out that the French did not invent sourdough. Sourdough goes back to ancient Egypt. Before sourdough was discovered they only ate unleavened bread. Then in Ancient Egypt it was discovered that flour and water mixed together and left for a few days began to bubble and rise. Leavened bread was born. Yes, many methodologies have been invented over the years of which Poolish is one but by no means does this mean Sourdough is French.

    Reply
  7. Anonymous

    November 12, 2014 at 7:34 am

    Hi, can you explain what do you mean by doesn't need to throw away half of the starter? Do you mean in the process of culturing the starter we dont need to discard any at all? At which day of the starter can I start this? Thanks.

    Reply
    • theundergroundrestaurant

      November 12, 2014 at 11:00 am

      Once you have a starter, however long it has taken you to make, or get one from someone else, usually the technique is to keep 'refreshing' it by throwing away most of it and adding flour and water. With this technique, you make a pre-ferment and you need very little starter to get a pre-ferment going. Literally a few grams.

      Reply
    • Anonymous

      November 12, 2014 at 11:04 am

      Hi,

      Can I ask you at what stage you're at. Do you wish to make a starter or do you have one and wish to bake with it?

      In the process of making a starter, and keeping it, many find they have to discard to stop building too much. But with careful management we can keep this to a minimum or not at all. Depends on how often you bake and how you use it.

      If you wish on more advice then feel free to ask.

      Reply
    • theundergroundrestaurant

      November 14, 2014 at 6:11 am

      Gee thanks for the patronising comment

      Reply
    • Anonymous

      November 14, 2014 at 6:41 am

      Do you mean my comment replying to original question by Anonymous!

      Reply
    • theundergroundrestaurant

      November 14, 2014 at 8:01 pm

      I didn't realise you were replying to another Anonymous! Sorry! (why is everyone bloody anonymous anyway?)

      Reply
  8. Sepatu Adidas

    February 13, 2015 at 7:44 am

    Great, thats look easy steps. Thanks 😉

    Reply
  9. Aj

    August 13, 2015 at 10:33 am

    late posting:
    The starter has to be fairly active to get the major ferment going, which is why I thought folks kept it refreshed…. and wasted a lot of flour…..
    going to give it a go as I am a Dutch pot user, my freestyles blow out one side…. not a good look.
    Good stuff K

    Reply
    • Kerstin Rodgers aka MsMarmiteLover

      August 14, 2015 at 9:49 pm

      Haha…yeah mine aren't beautiful shapes either. Got to back on the sourdough thing this autumn. Too darned hot right now.

      Reply
  10. Ally Lake

    August 17, 2015 at 6:22 pm

    Do you have a gluten free sourdough recipe?

    Thanks

    Reply
    • Kerstin Rodgers aka MsMarmiteLover

      August 17, 2015 at 7:10 pm

      I don't, I'm sorry. I've made gluten free bread once, using Doves gluten free flour. It made me feel extra sorry for all the coeliacs!

      Reply
    • Abe

      August 17, 2015 at 7:11 pm

      I'm never sure about Rye. Is rye OK?

      Reply
    • Kerstin Rodgers aka MsMarmiteLover

      August 17, 2015 at 8:02 pm

      Rye has gluten in it. But you can make sourdough with rye.

      Reply
    • Abe

      August 17, 2015 at 8:14 pm

      If sourdough rye is OK then should be quite easy. The trick with rye is very high hydration and make it like a cake. Prepare your rye starter, mix everything into a batter, go straight into final proofing and bake. You need to go as high as 90% hydration. So off the top of my head…

      500g rye flour
      442g water
      10g salt
      150g mature rye starter at 100% hydration

      Prepare your rye starter the night before: 30g starter + 60g rye flour + 60g water

      Next morning…

      In your dough bowl mix the 150g mature rye starter into 442g water.
      In another bowl mix the 500g rye flour and 10g salt then add to the starter/water mix.
      Stir until completely incorporated and its a thick batter.
      Then transfer to suitable loaf tin and smooth over.
      Then go straight into final proofing. When small wholes begin to appear on top it is ready to bake in a preheated oven. But don't wait till too many appear.
      Or you could sprinkle with rye flour after you have transferred it into a loaf tin and when it rises the flour will crack and look like a map. It'll be ready to bake.

      I think I have an all rye sourdough with raisins recipe which I'll have to find. I'll post it asap.

      Reply
  11. Abe

    August 17, 2015 at 8:40 pm

    Raisin Rye Bread by Emmanuel Hadjiandreou

    INGREDIENTS:

    150g dark rye flour
    100g rye sourdough starter
    200g + 1 tablespoon cold water
    200g dark rye flour
    6g salt
    200g sultanas / golden raisins
    150g hot water (not boiling, hot!)

    900g loaf pan greased.

    METHOD:

    1. In a bowl mix the 150g dark rye flour + starter + 200g and 1 tablespoon water. Cover and leave to ferment overnight. This is the wet mixture.

    2. Next day… In another bowl mix the 200g dark rye flour + salt + sultanas. This is the dry mixture.

    3. Tip the dry mixture into the wet mixture. Do not mix yet!

    4. Carefully pour the 150g hot water over the dry mixture.

    5. Quickly mix together and form thick batter.

    6. Spoon the mixture into prepared loaf pan.

    7. Dip plastic scraper or spoon into water and smooth over.

    8. Cover and let rise for about 2 hours.

    9. About 15 minutes before baking preheat oven to 240C (475F). Place a roasting pan on the bottom of the oven to preheat. Fill a cup with water and set to one side.

    10. When the dough has finished rising remove the covering.

    11. Place the loaf in preheated oven, pour the cup of water into the roasting pan and lower the temperature to 220C (425F).

    12. Bake for about 30 minutes or until brown.

    13. Take the loaf out of the pan and set on wire rack to cool.

    14. Bon Appetite 🙂

    Reply
  12. Ovy Ortega

    July 14, 2016 at 6:33 pm

    I tried Hadjiandreou's starter method. I did the tablespoon from the mother and added 1 cup of flour and 2/3 water. Bubbled beautifully but then as a dough (in both proofs using Ed Wood's recipe) it did not rise. Only rose a bit in the final baking, and that not much.

    Reply
    • Kerstin Rodgers aka MsMarmiteLover

      July 16, 2016 at 5:34 pm

      hmm. I know what you mean. After a while I had the same problem. I'm not sure why.

      Reply
    • Abe

      July 16, 2016 at 5:45 pm

      If the starter bubbles then the bread will rise. However there are so many variables one must take into account…

      1. Are you allowing the starter to mature enough?
      2. Going by the dough and not the clock have you allowed enough time for the bulk ferment?
      3. Again, judging by the dough and not the clock, have you allowed enough time for final proofing?

      Judging by the minimal info given it sounds as if you've under done the starter build or bulk ferment. Everyone's starter is unique and you need to learn what the starter and dough, looks and feels like, during each stage.

      As a very brief guide you should do the following…

      1. Starter should peak and just begin to fall.
      2. Or you can drop a bit of starter into some water and see if it flats.
      3. The dough should have full gluten formation and be aireated before going onto final proofing.
      4. Gluten formation is done when you gently press the dough and it springs back immediately.
      5. It'll have fine veins in the dough.
      6. It'll be billowy but not necessarily doubled.

      Try and try again. Best of luck.

      Reply
  13. Julie Wyatt

    January 5, 2018 at 5:13 pm

    I have made bread from this recipe and it has been good !! But there is one thing I am not certain about….I keep the 'mother' in the fridge and have had it for 2 moinths now without problem and when I want to make bread, I take 15g and mix it with 150g flour and 150g warm water to create the 'poolish'. However, as I only makee one loaf at a time, I have loads of 'poolish' left. Do I just throw this away ?

    Reply
  14. Julie Wyatt

    January 5, 2018 at 5:16 pm

    I have made bread with this recipe and it is very good but I have one little area where I am not clear:

    I use 15g of 'mother' mixed with 150g flour and 150g warm water to create the 'poolish' but as I only make one loaf at a time, I have too much 'poolish'. What do I do with this, throw it away?

    Reply

Trackbacks

  1. My Corona lockdown and cupboard essentials says:
    May 7, 2020 at 5:52 pm

    […] to add interest to porridge or rice pudding. Flour and yeast. If you can’t get yeast start making your sourdough. Use the discard for pancakes and pizza […]

    Reply

Leave a Reply Cancel reply

Your email address will not be published. Required fields are marked *

Recipe Rating


Primary Sidebar

MsMarmiteLover aka Kerstin Rodgers.

Chef, photographer, author, journalist, blogger. Pioneer of the supperclub movement.

This is my food and travel blog, with recipes, reviews and travel stories. I also stray into politics, feminism, gardening.

Subscribe to my mailing list

msmarmitelover

Kerstin Rodgers/MsMarmiteLover
Doing a spring budget recipe cooking demo for @bre Doing a spring budget recipe cooking demo for @brentcouncil Willesden library. I’ve been doing this a few times a year for the last few years. Wouldn’t it be great if they had a kitchen set up permanently. Libraries are community centres and could be used to teach how to cook from scratch.
Mother’s Day flowers from @siennamarla who is ex Mother’s Day flowers from @siennamarla who is experiencing her own first Mother’s Day with Ophelia. I’m still living in chaos & work was slow yesterday due to rain. Only another month…
Last week I did a wild foraging walk with @luciath Last week I did a wild foraging walk with @luciathewildkitchen in Kent @kent_downs_aonb just outside Canterbury. I’m going to help out during her May wild asparagus workshop. This chef lived in France, is a brilliant forager and cook. Her campfire meal of lentils, wild garlic raitha and a dukkah of alexanders, Parmesan was genuinely delicious not worthy like so much foraged food.
I did a bushcraft workshop with @naturalpathwaysbu I did a bushcraft workshop with @naturalpathwaysbushcraft Hannah Nicholls in Kent. An all female group, this felt very empowering and I must get myself one of these fire sticks. @kent_downs_aonb
Me @hamyardhotelsoho where I participated in a BRI Me @hamyardhotelsoho where I participated in a BRILLIANT block printing workshop with @mollymahonblockprinting it was a belated birthday present from @siennamarla The hotel is gorgeously designed, look at the fabric wallpaper behind me. Every corner is a feast for the eyes. Lunch was included and unlike many hotel restaurants the food was so tasty (and vegetarian), perfectly judged in quantity. Congrats to the chef. I got so excited on Friday I bombarded my timeline with stories which may have been a tad overwhelming. I’ve had a great week, going to Kent @kent_downs_aonb to meet foraging chef @luciathewildkitchen and bushcraft teacher hannah @naturalpathwaysbushcraft so it’s been one of extremes, from urban high glamour to roughing it outside in frosty countryside. I’m loving life as a journalist and photographer, I get to meet so many inspiring people. At home things are a bit grim because I’m having building work done and for almost 3 months I’ve lived in rubble, without heating, and sometimes without cooking or hot water. So these days out are fab for my mental and physical health. I will be posting more on Kent, Molly Mahon, Ham Yard hotel and the building works. #springiscoming🌸 dress by @designerfriday
Artichoke lasagne. I made a white lasagna with bec Artichoke lasagne. I made a white lasagna with bechamel, Parmesan, mozzarella and artichokes. I prepped the artichokes from fresh but you could use jarred. I had this @nonna_betta in Rome. It was so good I had to figure out how to make it myself. #artichokes #carciofi #romanjewishfood
Hags by Victoria Smith @glosswitch on twitter. On Hags by Victoria Smith @glosswitch on twitter. On the demonisation of middle-aged women. We are all karens now. We’ve passed our last fuckable day. This book, an easy read, not an academic one, is brilliantly written, with an ice cold anger at the way women over 40 are erased, told to shut up. Yes we call the manager. We are sticking up for ourselves. We don’t take shit anymore. We aren’t beholden to being liked by men, being girl-friend material anymore. Embrace your hagdom. You can buy your own flowers. #books #feminism #hags
Carciofi alle giudia, artichokes, Roman Jewish sty Carciofi alle giudia, artichokes, Roman Jewish style. I learnt how to prepare these from @silvia_nacamulli a local Jewish Italian cook and teacher, who recently wrote a book ‘Jewish flavours of Italy’ available from @green_bean_books you need the right type of artichokes: mammole are currently available @natoora via @ocadouk have some lemon quarters to rub on the newly exposed parts of the artichoke and put them in water with lemon juice to stop them going black. #you take off many of the outer leaves until they are half pale green. Then cutting in a circular upward stroke, you take off the hard green purple tops of leaves. It ends up looking like a peony. Cut off the fibrous parts of the stalk. Smear salt and pepper inside the flower. Fry at 150c for 15 minutes. Remove and drain, open up to look like a sunflower. Then fry again at 180c until the outer leaves are golden and crispy. Serve immediately. Divine! #jewishitalianfood #carciofi #artichokes #mammole #artichokeseason
@silvia_nacamulli has just brought out a fantastic @silvia_nacamulli has just brought out a fantastic book ‘Jewish flavours of Italy’ . She lives local to me so I went round to see how she prepares artichokes for the famous carciofi alle guidea and artichoke stew. You need mamole artichokes that are in season now from @natoora I’ll be publishing a longer video on YouTube and a piece on her cooking in the @hamandhigh
Whipped feta dip is so simple: a block of feta, a Whipped feta dip is so simple: a block of feta, a couple of spoons of yoghurt, some lemon juice, whizzed up. Add black pepper or herbs. #5minuterecipes
This is what I’ve been doing for the last month. This is what I’ve been doing for the last month. Want to replace window overlooking garden with a wider, lower one but struggling to find something nice. All new sash windows look kinda fake. #vintagewindows #building #exposedrafters
Baking for the builder: cranberry pie with cream. Baking for the builder: cranberry pie with cream. Just because you are a builder it doesn’t mean you don’t appreciate pretty pink china and home baking. #builders
My piece is The Great Read: My piece is The Great Read:
Naples at Christmas- discovering piennolo di vesuv Naples at Christmas- discovering piennolo di vesuvio,the Christmas 🍅, which lasts up to a year fresh. It’s given boxed as gifts around Christmas being the only local fresh tomato available. It dresses all the Christmas pizzas and pastas. It’s grown on volcanic Vesuvius soil and sparsely watered. As a result it has thick skins, and a sweet intense flavour. #tomatoes #italy #naples
Not cooking much at the moment due to a thick laye Not cooking much at the moment due to a thick layer of dust over my kitchen. This will be my dining room/photography studio. Done on a whim.#unplanneddemolition
Another picture of my granddaughter Ophelia in a n Another picture of my granddaughter Ophelia in a nest of apricot tulle (found at portobello market). Isn’t she lovely? #granfluencer
Broccoli Stilton soup. This freezing week is defin Broccoli Stilton soup. This freezing week is definitely a week for soups. My friend @jimfrommanc is staying & needs his hot lunch.
Cheese on toast with crushed chilli 🌶️ in Ven Cheese on toast with crushed chilli 🌶️ in Venice the fresh food market sells bouquets of colourful chillies. I’ve still got mine, drying in an enamel jug. #travelandfood
The Christmas tomato or piennolo di vesuvio. Read The Christmas tomato or piennolo di vesuvio. Read all about it: https://msmarmitelover.com/2022/12/christmas-in-naples.html  Got a couple of bunches hanging in my kitchen. #naples #campania #tomatoes🍅 #travelphotography
Opheliagram. This morning I photographed her in an Opheliagram. This morning I photographed her in an Italian outfit I bought in Naples on a William Morris playmat which looks great and is practical for tummy time. So many things are different about parenting now. Parents use apps to track feeding, pooing, weeing etc. You don’t bathe them anymore for the first few weeks because you want to leave the vernix ( the white waxy stuff they are covered in at birth) on their skin as long as possible. Nappies now have a line on them that turns blue if they’ve done a pee. White noise apps to help them sleep. New technology guides new parents. As well as ancient probably prehistoric customs being rediscovered. #granfluencer #grandaughter I’ve tagged in @siennamarla and @jamescalmus as the authors of this baby.
Load More... Follow on Instagram

Archives

Copyright © 2023 msmarmitelover