
Sunday’s Secret Garden Club afternoon explored the world of herbs and medicinal plants. We looked at how herbs have been used both for culinary and remedial purposes, what herbs can be successfully grown, both indoors and outdoors, how to raise them, harvest them and store them. We also gave a brief historical overview of the use of herbs through the centuries and we were particularly lucky to have Natasha McEnroe, the director of the Florence Nightingale Museum, on hand to give a short talk on the contents of Miss Nightingale’s Medicine Chest, which contained the remedies, mainly herbal which she took to the Crimea with her and which now resides in the Florence Nightingale Museum itself.
The workshop was not intended to attempt any sort of diagnosis or prescription for herbal remedies – none of us are qualified to do this. It is always important to seek the advice of a trained professional before taking any kind of medicine and herbal remedies must be used in the correct way and the correct dose. An overdose (or ingestion where a remedy is meant to be used topically, for example) could be dangerous and/or toxic.
Herbs have been used both for culinary purposes and for the treatment of ailments for centuries. Writers describing the Hanging Gardens Of Babylon, which were supposed to have been constructed around 600BC, included thyme, coriander, saffron crocuses, anise, poppy, rosemary, and hemp among the plants they listed.
 People have been reserving patches of ground to cultivate herbs for hundreds of years. In this country, the physic or infirmary garden was an important part of the grounds in a monastery. Monks not only cultivated fruit, vegetables and herbs for their own use, but often for the wider community as well. The monastery infirmary treated the sick from the villages nearby and remedies made from the physic garden were the main means of treatment.
Herbs grown for culinary and medicinal use in the mediaeval monasteries included cumin, fennel, comfrey, feverfew, yarrow, pimpernel, rosemary, sage, rue, lavender, rose, iris, mint, lovage and pennyroyal. You’d also find mint and wormwood in the kitchen garden
Recreations of monastic herb gardens can be found at
- Buckfast Abbey in Devon
- Norton Priory near Runcorn
- Gloucester Cathedral
As long ago as 1652, Nicolas Culpeper, a herbalist who worked in London – and a radical who was way ahead of his time in many respects – wrote two books, The English Physician and The Complete Herbal, which documented the herbal medicine used at the time and was hugely influential.
Culpeper was a radical in many ways – he was accused of witchcraft during the English Civil War – one thing which shows the state of medicine at the time is that he was considered highly eccentric because he insisted on examining his patients instead of just examining their urine.
The herbs
I’ve documented the individual herbs in the Secret Garden in the Plant List page. At the moment, the garden contains:
- Bay
- Dwarf comfrey
- Echinacea
- Fennel
- French marjoram
- French tarragon
- Golden thyme
- Japanese parsley
- Lavender
- Lemon balm
- Mint
- Moroccan mint
- Oregano, also Golden Oregano
- Parsley, both flat-leaved and curly
- Pineapple mint
- Rosemary, both Rosemary ‘Gorzia’ and ‘Miss Jessopps Upright’
and also Aloe vera, which isn’t, of course, a herb, but certainly counts as a medicinal plant.
Coriander, grown as microleaves
Coriander has a tendency to bolt, ie, set seed before it’s produced much in the way of leaf. My solution to this problem was to grow it to harvest as microleaves.
You’ll have seen microleaves on your restaurant plate or in the supermarket. Coriander is a good herb to try this way, because you get all the flavour of the coriander even though you are harvesting it when the leaves are still very small. Long before you get to the bolting stage, anyway.
The plants will be grown for just 4-6 weeks so you don’t want to waste a load of compost on a deep pot. I find using an ordinary seed tray works perfectly well. Make sure it has the drainage holes at the bottom.
Fill with compost, water it well and let it drain.
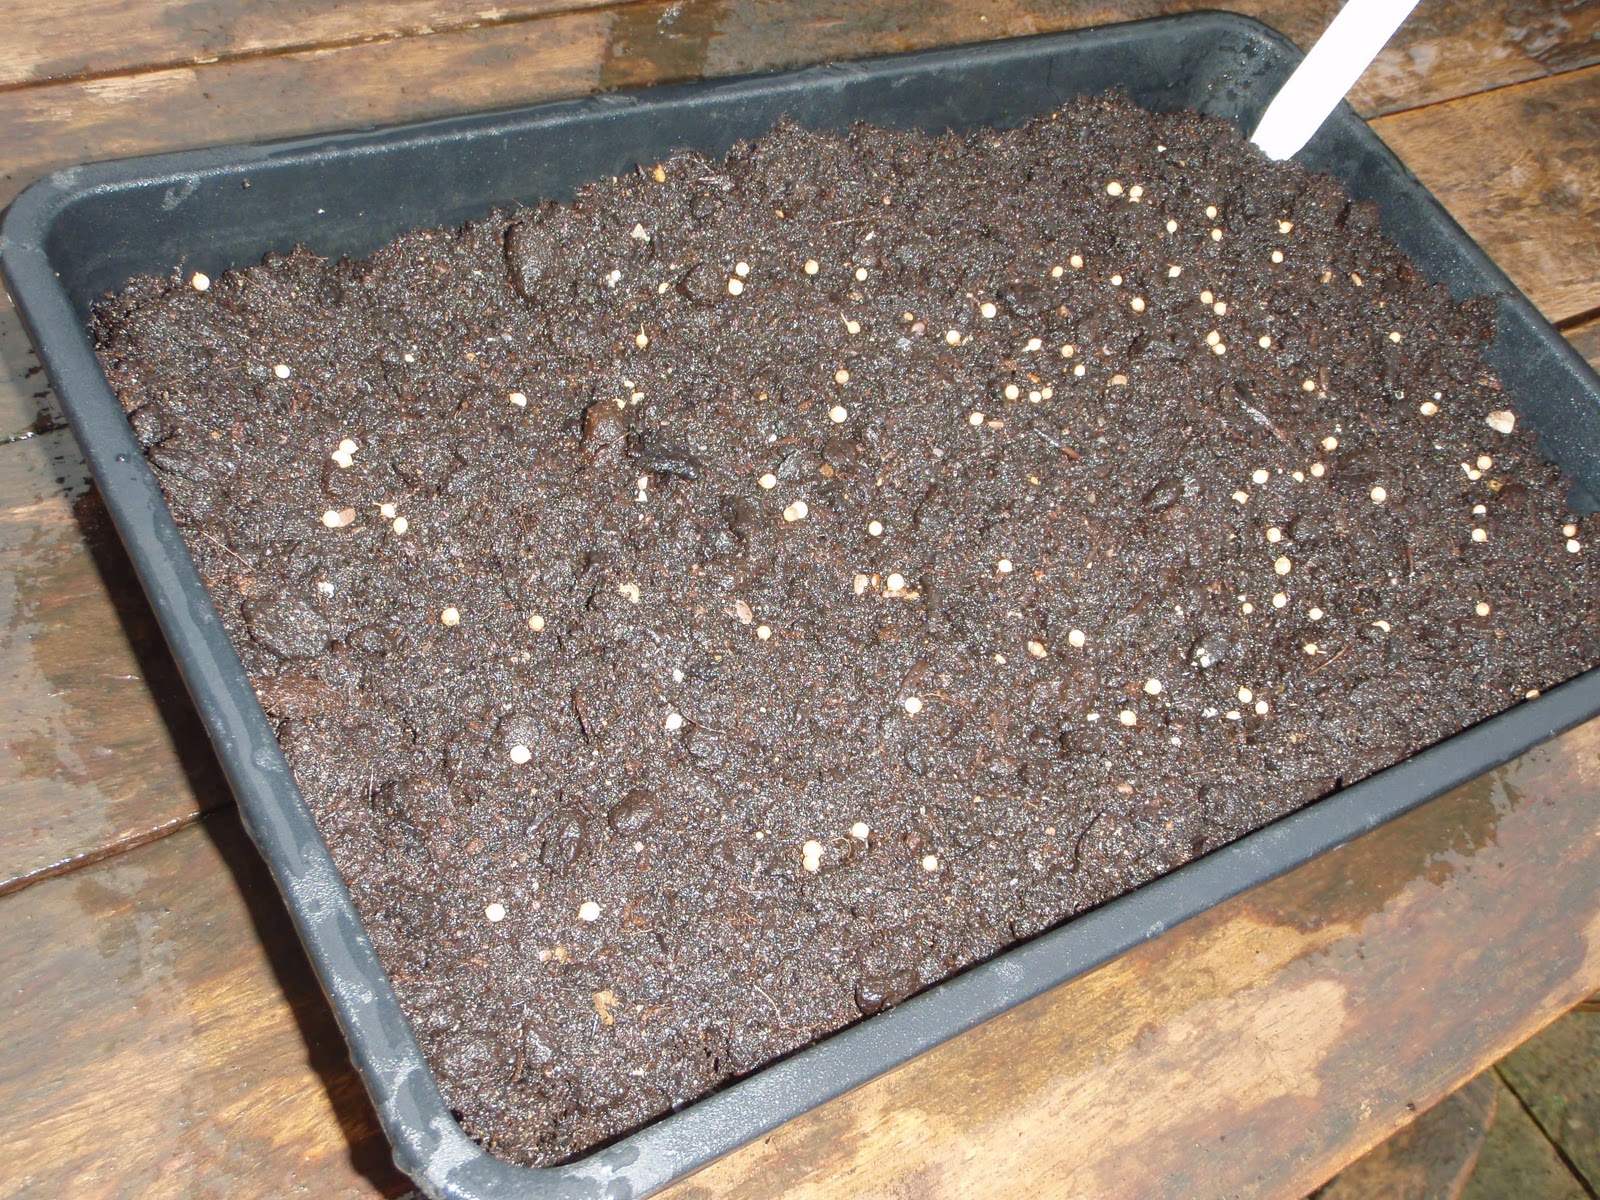
Firm it lightly, then sprinkle over your seeds. You can sow more thickly than you usually would, because you’re not trying to raise fully-grown plants. Cover the seeds lightly with soil. Then – if you’re sowing early in the year – cover the seed tray with a plastic bag or its own lid (from April onwards, you won’t need the protective covering). Put it on a sunny windowsill and wait for the seedlings to come up – from 3 days in spring and summertime to a week or 10 days if you sow earlier.
Once they’ve germinated remove the lid. The next day, check to see if they need any more water. If in doubt, don’t water – you are more likely to drown emerging seedlings than to starve them.
Start cutting when the leaves are substantial enough – when the plant is about an inch or two high. Don’t be tempted to let them grow on – the tray is too shallow to let the roots develop properly and you’ll get straggly plants which bolt.
I usually keep a couple of trays going at once to keep the supply going.
Growing basil
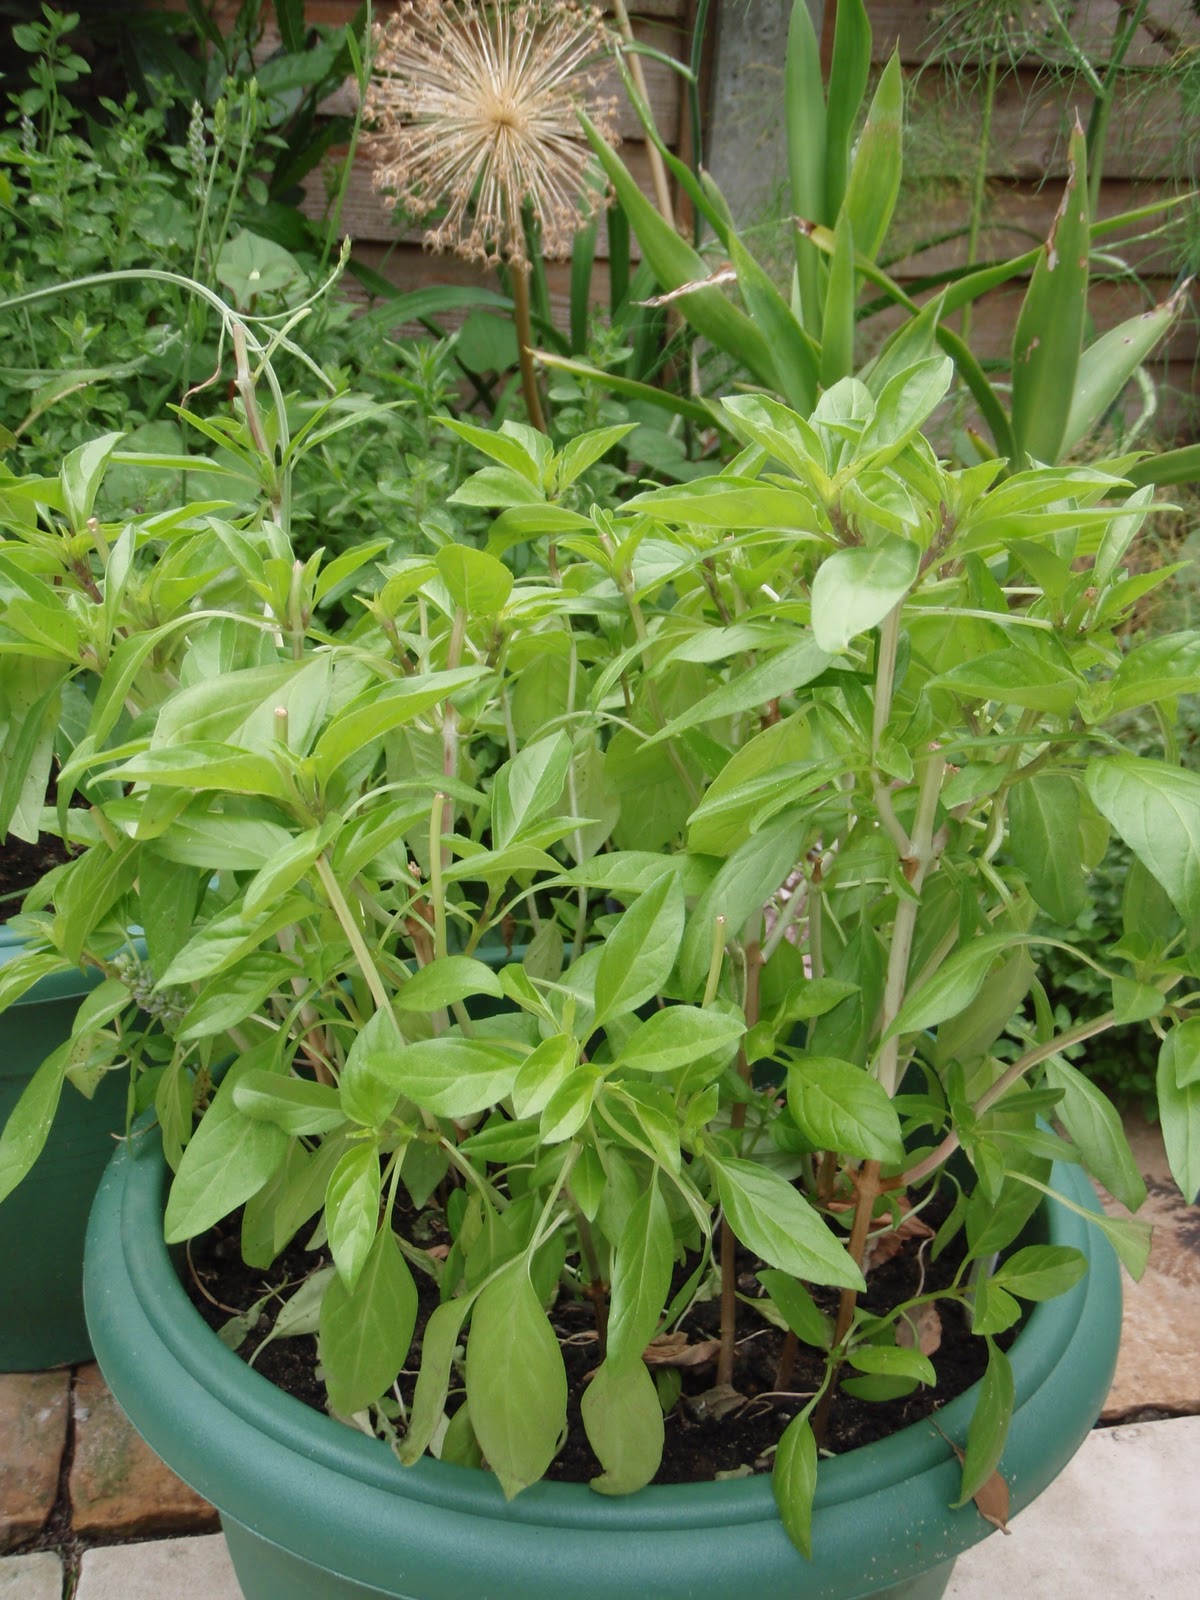 After a fair bit of experimentation, I’ve decided basil is best grown indoors in the UK. It’s not so much the climate as basil’s fatal attraction to aphids, or greenfly, when grown outdoors.
Basil is also one of those herbs where you want lovely big lush leaves – outdoors, basil always gets straggly very quickly.
So, it’s pots on the windowsill within arm’s length so that you can snip off leaves whenever you want.
Basil likes lots of light. It’s very early to sow basil in January and it won’t really get going until the days get longer in March. But you’ll still get a head start.
Fill your pot with a good rich compost – multipurpose is fine – and firm it lightly. Water well and let it drain. Sprinkle the basil seeds over the compost, and just cover – very thinly – with soil. Put the pot on a sunny windowsill.
Seeds will germinate within a week – in about 3 days in high summer.
Let each plant grow until it has at least 4 leaves before cutting any and always leave each stalk with at least 2 true leaves to enable it to regrow after harvesting.
One of the questions I’m often asked is “Why not just grow basil from a pot bought at the supermarket?”
The answer is that supermarket pots of herbs are grown purely to produce a crop of leaves for a single occasion – the time that you buy it. The plant will have been raised under intense lights to grow as quickly as possible. It will not have been given time to put down a proper root system so the plants are essentially weak.
The soil it’s in is almost certainly sterilised: the last thing the supermarket wants is for you to find greenfly or other bugs in there. So there won’t be much in the way of nutrients to sustain the plant after you get it home and starting cutting its leaves off – which will reduce the plant’s ability to photosynthesise.
The plant you raise from seed should keep going all summer. It will have good rich soil, it will have been properly watered, and a decent root system.
And finally, I’ve only ever found ordinary sweet basil in the shops, which is a shame, because there are wonderful varieties of basil which are really just as easy to grow.
Having said all that, I do find that Waitrose’s basil pots keep going longer than anyone else’s and I usually buy a Waitrose pot in February and it should last until April when my own homegrown ones get going. Keep watering it well.
Vertical gardening
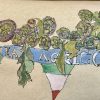
If you don’t have space to let your herbs spread out, why not let them grow upwards? I’m sure you’ve all seen amazing vertical gardens at Chelsea or Hampton Court Flower show – here’s a very small-scale domestic version, but it uses the same principle.
This is an effective way to grow microleaves or small plants – thyme, basil, parsley, coriander, chervil, for instance. Take an over-the-door storage hanger, for example, one with slanting pockets for documents, or shoes. Try to get a plasticised one – a plain cloth one will be too leaky and will look very unattractive.
The first thing to do is to make some drainage holes at the bottom of each pocket – this is very important because otherwise you will waterlog your plants. Next add a little soil into each – don’t overfill or you’ll spill. Then sow your seeds or insert your seedlings.
Finally, find a place to hang it. On an outside door might be the best to get the sun. Indoors, you’ll need somewhere facing a sunny window.
This isn’t a long-term herb garden, but it will provide you with fresh herbs of your choice for the best part of a season in a small space.
Harvesting – general guidelines
- Harvest herbs by cutting little and often. Don’t cut the plant right back to a bare stem, or it won’t recover.
- Harvest before the herb flowers – the leaves will be less flavoursome after the plant has flowered.
- Always cut the leaves rather than pulling at them – you may weaken the plant.
- The best time of day to harvest herbs is the late morning – the dew will have dried off the leaves and the sun (hopefully there will be sun) will have warmed them enough to intensify the flavour of the volatile oils, but not enough to dry them out.
- If your herbs do flower, let them go on to set seed, which you can then save for the next year.
Saving seed
Having successfully raised your herb plants they will eventually set seed if you let them grow. Herbs like coriander, dill, fennel have seeds which are used in the kitchen as well as the leaf.
Even if you don’t eat them, you can save the seeds to grow next year. This is one way to ensure that over the generations you get seed which is perfectly adapted for your conditions.
Let the plant grow and flower, after which it will set seed. Cut the seedheads before they fall to the ground. You might want to put the whole seedhead in a paper bag and snip the stem to ensure no seed is wasted.
Next, remove the chaff – bits of stalk and seedcase. Put the seed in a jar and seal. Label it carefully.
Store seed somewhere cool, dark and dry.
There are excellent detailed instructions for saving seed from all sorts of plants, not just herbs at the Real Seed Company’s site at http://www.realseeds.co.uk/seedsavinginfo.html.
Storing herbs
When fresh herbs are unobtainable, or not at their best, it’s good to have some preserved for use at any time. There are a number of ways you can do this.
Drying
Some herbs dry better than others: oregano, tarragon, bay leaves are all good. Basil is useless, and I can’t really get on with dried parsley. Thankfully parsley freezes well.
To dry herbs, pick a big bunch on long stalks. Remove any brown or damaged leaves and check over for insects and mites. Wash and dry if necessary. Tie the stems together and wrap loosely in muslin or put them in large paper bag. Close the bag around the bottom of the stems and punch some air holes at the top of the bag.
Find somewhere warm, and well-ventilated without being draughty, where you can hang your herbs up. If you can’t hang them up, then lay them out singly with space around each stem on a tray. Under the rafters in the loft, an airing cupboard, or a cupboard under the stairs are both good. I dry most things over the cooker hood.
Leave the herbs until completely dry, then transfer to a jar. Try not to break up the leaves – they will retain their flavour better if you crumble them just before you use them. Seal tightly and store in a cool, dark, cupboard. Remember to label them properly: dried herbs do not look the same as their fresh counterparts. Use within a year or they will lose flavour and start to taste of dust. Ideally, use them within three months.
Freezing
Some herbs freeze very well: parsley for instance, and basil is OK as well. You can either freeze the herbs in a bag, or in ice cube trays.
When you freeze herbs in a bag, you can keep them dry. Choose the best leaves or sprigs and lay them out in a single layer, not touching, on a tray. Place in the freezer and leave until frozen. Transfer to a freezer bag and seal. (This 2-stage freezing keeps the leaves separate in storage: if you put the leaves in the freezer bag all at once they will freeze together in a clump.)
To freeze in an ice cube, chop the herb finely, then squish into ice cube trays. Carefully fill the tray until the herbs are just covered. Freeze, then remove from the freezer and top up each cube with water. (Again this is a 2-stage process: when you initially freeze the chopped herbs in water they will float to the top and be partially exposed to the air. Adding the extra water layer on top ensures the herbs are completely sealed in ice.) Push the cubes out of the trays, transfer to a bag and replace in the freezer.
Frozen herbs should be used within 3 months.
Oils, vinegars and butters
You can also make herb vinegars, which are fantastic for salad dressings, herb oils, or herb butter.
Herb vinegar is very simple – tarragon, fennel or rosemary make gorgeous vinegars. Tarragon vinegar makes the best Bearnaise sauce.
Wash and dry the leaves, then bruise them slightly. Put them in a sterilised jar, cover with your base vinegar (could be wine, or cider vinegar) and leave somewhere warm for 2-3 weeks, giving it a good shake every now and then.
Strain the vinegar through a fine sieve or muslin into another sterilised bottle. Seal and use when required.
Herb oil is a little more complicated because there is a small but real risk of botulism. Anything with any moisture content can contain Clostridium botulinum, the bacterium that causes botulism. It develops in anaerobic conditions, ie, where air is excluded, so moist herbs covered in oil could well be a breeding ground for the bacteria.
To make herb oil safely: use fresh herbs, infuse in the oil, refrigerate and use within a week. Or, dry the herbs thoroughly first, then add to the oil. More generally you can also eliminate the risk by adding acid – you’ll find a lot of commercially available garlic-in-oil uses garlic which has been preserved in vinegar first.
Herb butters are delicious and deceptively simple to prepare. You can use them straightaway, or freeze them for up to six months. First, get your butter out of the fridge to soften. Chop about a tablespoon of your chosen herbs – chives, parsley, dill and tarragon are particularly good – for every 125g of butter. Mix in well and add a little lemon juice – about a teaspoon.
Chill the butter until it’s hard enough to be shaped. Then roll it into a cylinder and wrap in clingfilm. Place in the freezer. You can then slice off a disc every time you want some herb butter to add to your meat, a tureen of vegetables or your corn on the cob.


As I missed the actual workshop, great to read the notes! Wouldn't it be fantastic to recreate the hanging gardens of Babylon…
It feels good to find such an interesting topic on the internet like this one nowadays. I was greatly interested with what you have shared and posted with us. Thanks for this anyway.
DMAA